Pin it!

Follow Me on Pinterest
Showing posts with label cooking. Show all posts

Friday, August 26, 2011

The Magic of a FoodSaver

This machine is my new best friend:

Originally used in our house for freezing meat during hunting season, crab meat in the summer and fresh fruit from nearby farms, it now freezes William's baby food.

I have been using this tray which makes 1 oz cubes:

Once I puree a fruit or vegetable, I freeze one tray's worth and keep any remaining puree in the refrigerator and use that first. The next day I pop out the cubes and put them into 3 inch bags I cut from the roll. I use the "manual seal" option to seal off one end before putting in the cubes. I usually do three because that is two feedings worth so it is easy for me to thaw.

Then, I use the "vacuum seal" to suck out all of the air and seal up the other side of the bag. And that's it! NO FREEZER BURN! After my other post about baby food, a few friends on Facebook told me the bad part was freezer burn. Well, this prevents it.


Thursday, July 14, 2011

Baby Food in a Flash

Today we went to a farm in town that has pick your own produce. We went for the peaches (only $1.49/pound!), but left with peaches, blackberries and a dozen zinnias for my dining room table. My husband doesn't eat peaches so I decided that even though I only picked 7 today, I'd make my first batch of baby food. W is still only consuming breastmilk, but in the winter, he will have "fresh" peaches!

Since the peaches are organic, I scrubbed them good with a produce brush to get off most of the fuzz. Then I cut large cubes and put it all in a steamer pot. I brought the water to a boil and kept it boiling for 10 minutes. Then, I let the peaches cool and tossed them in the blender. What makes this even easier, is that my blender has a Baby Food setting which I was finally able to use! I pureed it down until it wasn't chunky at all.

I have these 1oz silicone trays from my baby shower which is a bit easier to use than an ice cube tray (also 1oz) because it is flexible silicone. I got thirteen 1oz portions and they are in the freezer. Tomorrow I'm going to pop out the cubes and store them in a labeled bag in the freezer so I can use the storage tray for my next creation.

For the price I paid, not only is this a cheaper option, but it is also healthier for our baby boy!

Thursday, June 30, 2011

Summertime Locavore {sort of}

Summertime is here which means one of my favorite things is happening: farmers markets! We have our own garden, but all of the farmers markets are a few weeks ahead of us when it comes to having vegetables ready so I am shopping there for now. I consider myself a summertime locavore. I do realize that all-year "true" locavores would be disappointed in me since I only buy local beef (from a family member's farm) and produce, but you have to start somewhere right?!

Two weeks ago week we ate our first plain tomato. We simply washed it, sliced it and ate it plain and to the delight of my taste buds, it was incredible. The tomato came from an orchard less than one mile away (very lucky for me).

So, reap what you sow (if you have a garden of your own)! We have been eating all homegrown lettuce from our garden for a couple weeks now. The flavor is unlike anything I've ever tasted, but don't come to our house if you don't like lettuce that packs a punch.


We're actually going to plant more in place of our onions, which are very strong and pungent as onions should be, so we can have lettuce longer through the summertime.


I have been picking and shelling peas everyday and sometimes we put them in hot water for a short time to soften them up or we put them raw into our salads.


The cucumbers are ready too!

Saturday, June 25, 2011

$11 at Harris Teeter

Yesterday I stopped by Harris Teeter to pick up a few grocery items. I will preface this by saying that the trip was not on a whim and not for my weekly shopping. William is being baptized on Sunday so after the service we will be having more than a dozen adults and a handful of children over for lunch. Only one other time have we had that many people over and I did not have a newborn, but I digress.

I get Harris Teeter's eVIC emails since I am part of the program and shop their regularly. I received one the other day that told me a few things:
raspberries BOGO
shredded cheese BOGO
asparagus $1.99 (instead of $3.79)
Texas Pete 10/$10
Coupons doubled up to $1.98 face value (usually it is only $0.99)

After doing 98% of my party food shopping at Costco earlier this week, I went to Harris Teeter to get a few last minute items and some of these newer things that caught my eye. I was armed with my short list and my coupons. Here is what I bought:

The Hershey syrup wasn't on my list, but I remembered my husband requested it for chocolate milk so I added it to the basket.
The total cost of my purchase was only $11.27!! How did I do it?? Why, let me tell you :)

- If items are BOGO or x/$x at Harris Teeter, the price divides out. So, I only bought one container of raspberries which is all I needed, and paid $4 instead of $8
- The asparagus was only $1.99 which is a discount of nearly $2. Why is it always so pricy??
- The Texas Pete was $1 for the bottle, plus I had a $0.40 coupon that doubled so it only cost $0.20
- I bought the salad dressings in case guests don't like what we have here on Sunday and because they were BOGO at $3.25 and I had a $1 coupon that doubled so I got two dressings for $1.25
- The shredded cheese s good on top of hot tomatoes, pizza, salad, etc and since it was $2.79, but BOGO, I only paid $1.40
- I needed the concentrated OJ ($1.67) and lemonade for one of the beverages I am making Sunday and the lemonade one was less than $1
- The Nabisco Triscuits were BOGO $3.89 and I had a $1 off coupon that doubled so I got both boxes for $1.89.
- And then there is the Hershey syrup that did nothing for me except add $2.29 to my total.


My receipt says that $24.36 in coupons were redeemed because a few of the in-store deals are considered eVIC coupons. In reality, it was $16.31 VIC savings and $8.05 in coupons.


Yes, I am pleased with myself considering I got fruits, veggies, dressing, crackers, cheese and salad dressing! AND I am done shopping for the party!

Friday, May 13, 2011

Five Ingredient Roast

Last week I made a great five ingredient roast from the blog, A Year of Slow Cooking which was recommended by my friend IRL Emily who frequently uses her crockpot for all sorts of recipes.

The recipe calls for five ingredients, all of which I had at home since we have a deep freezer full of meat. My husband has farmers in the family so we pretty much purchase one year's worth of red meat in February.

Ingredients:


3 pounds beef roast (mine started frozen)
1/3 cup molasses 
1/3 cup dijon mustard (I used honey dijon since that is what I had)
1 teaspoon garlic powder
2 tablespoons white or apple cider vinegar (I used 3T)

Instructions:
Toss everything into the slow cooker (the best part of using this cooking method in my mind). Turn the roast over a few times so there is some sauce/seasoning on both sides. 


Cook on low 6-8 hours or on high for 4 hours.


I cooked ours for about 7 hours and we got six or so servings out of it. Let me know if you try this or have another good suggestion -- love the tips!!


It's So Very Cheri, Not Baaad Sundays,  Sundae Scoop

Thursday, February 24, 2011

Bakerella's Cake Balls

Years ago, my cousin Kate who doesn't cook, or at least she didn't used to cook, raved about a blog called Bakerella. I have been reading the blog regularly, getting all sorts of great ideas, but wndering when I, a young wife who doesn't regularly have large groups of people over, would be able to make some of these awesome creations. Well, I did it.

I will admit, I started with the basic cake balls, but it was a start. This past weekend we were having friends over with three young children who I knew would get a kick out of the bite size treats. I intended on using green and white chocolate, but my dear husband who picked up the ingredients for me, only found milk chocolate. Bless his heart, I didn't complain! So they went from St. Patrick's Day themed to basic with some decorations.

I already had cake mix and batter in the pantry, as well as some sprinkles and powdered sugar, so I only bought two bags of melting chocolates which was less than $5. I baked the cake according to the standard directions on the back of the box. Once it was cool, I broke up the cake and transfered it to a glass mixing bowl and started turning it into crumbs (my cat appreciated the bits that fell on the floor).


I gradually added vanilla frosting while mixing because I've read mixed reviews about using 1/2 can of frosting versus a whole can, etc. When all was said and done, I used a little more than half. Once it seemed pretty well mixed, I dug in with clean hands to "smush" it all a little more.


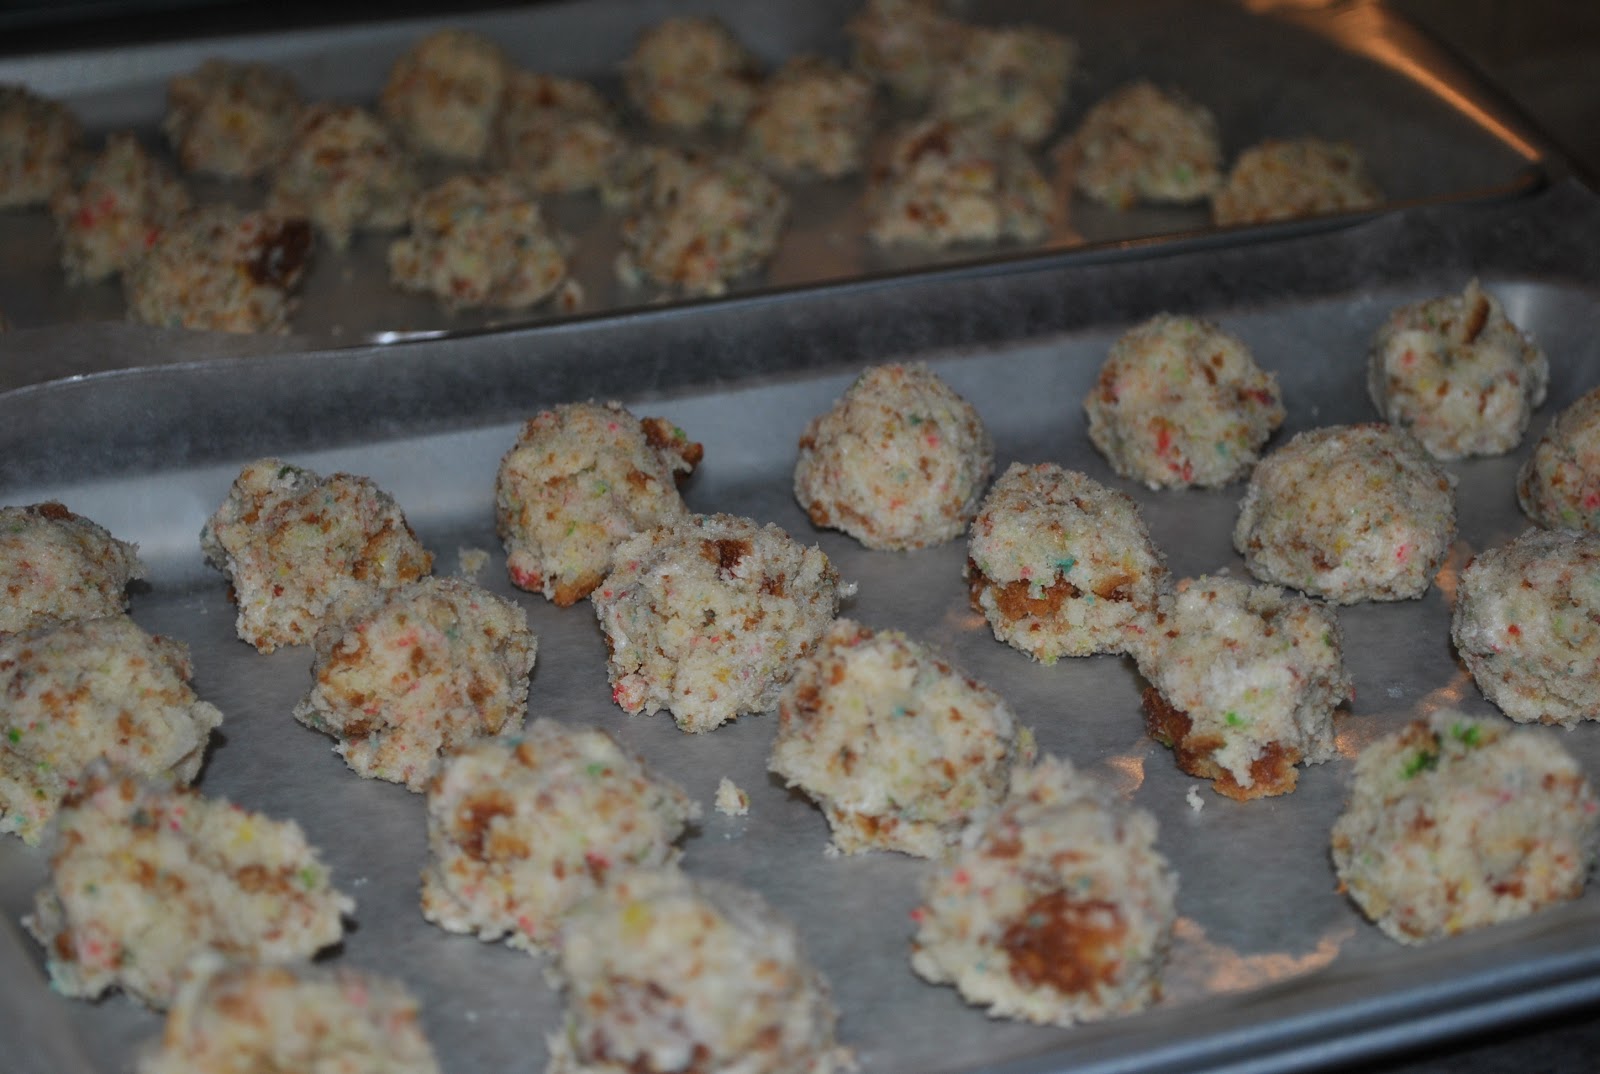
Then you start rolling. If you like making meatballs, you'll be good at this. Oh and it is nice that you are playing with cake, not raw meat. I probably could have made my cake balls a little smaller so they were more bite-size for children, but I learned for next time! I just lined two cookie sheets with wax paper to make clean up a breeze and started rolling.


I got three dozen cake balls out of my one cake. I put the trays in the refrigerator overnight, since pregnant ladies get so tired ;), so they would stick together.

The next day I melted the chocolate wafers and placed 3-4 balls in the bowl at a time to coat with the chocolate.


Once coated, I transferred to wire cooling racks and added sprinkles or powdered sugar while the chocolate was still wet. I did keep some plain, but I knew the kids would like the decorated version.


I put about half of them in the freezer so I have an easy way to satisfy my sweet tooth. My husband really liked them so I will be making them again...hopefully I will take on a more creative version that doesn't look like an elementary school student made them :). I can just see myself hosting birthday parties, playgroups, etc and serving up all sorts of fun treats!


It's a Keeper, HoH, Get Your Brag On, Somewhat Simple, Weekend Wander, I <3 Naptime, Weekend Wrap Up Party

Monday, February 7, 2011

Snow Day Chili

I  have been working from home sometime because of the ice on our steps, the road, the car, etc. Obviously icy conditions are dangerous for everyone, but my husband and managers are even more concerned with me carrying this little thing we call a baby in my belly.

At lunchtime yesterday I made myself grilled cheese with tomatoes for lunch, but I also decided to make dinner while I was at it. Since I am banned from going outdoors, I looked in the pantry and decided the best option was crockpot chili.

Ingredients (based on what I had on hand):
1 onion, chopped
baby bella mushrooms, chopped (about the same amount as the onion)
1 can black beans, rinsed
1 can kidney beans, rinsed
1 can diced tomatoes, chili-ready
1 can diced tomatoes, plain
venison cubes (my husband hunts)


I poured all of these ingredients in the crockpot and started dinner at 12:30.


After about four hours I added some garlic powder, chili powder, oregano and cayenne pepper to season to my liking. At six I added in Texas Pete hot sauce because it wasn't spicy enough.


By the time my husband came home from work, dinner was ready!

Tuesday, January 18, 2011

Double Cranberry-Apple Sauce

On Nov. 13, 2009 we moved into our new home. Thirteen days later we hosted Thanksgiving for nine adults. Talk about getting thrown into it?! No, we volunteered, but there certainly was alot going on. I am very organized when it comes to planning holidays in advance so I had my menu picked out as soon as we had approval to move-in which meant our families would be coming to our place to celebrate Thanksgiving.

One of the recipes I came across was this double cranberry-apple sauce from Southern Living's November 2003 issue. I wanted to do something different than the typical cranberry sauce so I tried this out and have made it for a few holidays since. I also freeze extra and serve it with chicken or eat it on its own throughout the year.

Ingredients for 5 cups of sauce (I've found it makes more):
6 large Granny Smith apples, peeled and diced
1 (12 oz) package of fresh cranberries
1 small lemon, sliced and seeded
1 cup sugar
1/2 cup water
3/4 cup sweetened dried cranberries (like Craisins)

In a large saucepan (I use a big spaghetti pot), stir together the first 5 ingredients over medium-high heat until it starts to boil. Continue to stir it often.


Reduce heat and continue to simmer for about 15 minutes until cranberries pop (seen below) and mixture starts to thicken.


Remove the pan from heat and stir in the sweetened, dried cranberries. Allow time to cool and chill in the refrigerator until ready to serve.


Another wonderful thing about this recipe??? You can store it in the refrigerator for up to two weeks!


Today's Creative Blog, Try it Tuesday, Mad Skills Party, We Did it Wednesday, Hookin Up with HoH,

Wednesday, December 1, 2010

Reverse Caramel Apples

Happy December!! I thought I'd start off the month with an easy recipe that is a great way to spruce up dessert!

On Saturday we had two good friends over for the evening and to watch the Clemson-USC football game (no I do not want to discuss the results). I always take advantage of having additional guests at our home to try new recipes that I wouldn't necessarily do on a "normal" night since we don't get home from work until 7 p.m. This time I opted for dessert when I saw this post from Random Thoughts of a SuperMom. I did modify it to make it easier and use a different ingredient. For the record, you will notice that some of my posts coming up are not my original ideas, which is why I link back to the owner...I have no qualms about admitting that I got the idea from them!

I started with four apples (3 granny smith and one leftover from the orchard down the road). I cut off the tops of each apple and then cored it using a knife and grapefruit spoon with the "spikes" on the end. I could not find caramel chips for the life of me, so instead I bought bits of Heath Bar which I suppose technically made them toffe apples, not caramel apples. I also bought a small bag of already crushed nuts, like the kind for ice cream sundaes, so I didn't have to crush up anything.


I combined some toffee bits and nuts in a bowl and then filled up the cored apples. I spooned a dollop of butter on top of each and put in the oven for 35 minutes at 350 degrees. I bought vanilla ice cream (so that means we have four types of ice cream in our freezer...blame it on my pregnancy) which was delicious on top.


Hope you enjoy!


Whatever Goes Wednesday, Blue Cricket Design, What's Cooking Wednesday, Somewhat Simple, Rock Your Recipes, Tatertots & Jello

Monday, August 23, 2010

Homemade Goodness

For the record, its not that I haven't been doing any house projects lately, but they are just taking me longer than usual because the summer weather makes me want to sleep - all the time. So, look forward to seeing my dresser and window frame turned into picture frame in the fall.

Last week I used a wedding gift for the first time. It is an ice cream maker. I did not register for the ice cream maker because I never thought about taking the time to make my own ice cream, but now that I did it once, I think we're hooked! My in-laws were over for dinner so my mother-in-law helped me out. (I see a trend here since my mother helped me with the chocolate dessert last week).

Anyway, I have a 4 quart Rival electric ice cream maker. There is no handle to churn, but there is a motor that does all the work for you and a see through cover so you can see the ice cream "growing" by the minute. The recipe used sugar, milk, whipping cream, and vanilla extract.


Once the liquid mixture was in the canister, it took 40 minutes. I spent maybe 10 minutes measuring the ingredients, dissolving the sugar and mixing it all together. Although the recipe says to dissolve the sugar on the stove, an old pro told me just to heat up a little bit of the milk, dissolve the sugar in it, and then add the rest. Worked like a charm and saved me some steps.

We went with classic vanilla this time and it is the most scrumptious ice cream I have ever tasted. Brad and I have been enjoying the gallon for the past week and have more than a half-gallon left. We have been using chocolate syrup (him) and sliced peaches (me) as our toppings - delish!