Pin it!

Follow Me on Pinterest
Showing posts with label kids. Show all posts

Thursday, June 21, 2012

Blueberry Boys (and Blueberry Jam!)

It is finally blueberry-picking time here in Maryland so last weekend I took William along with my friend Erin and her 22 month old son to Homestead Farms in Poolesville where I always like to go for PYO (pick-your-own) fruit. PYO blueberries are only $2.49/pound which was great. We finally had a break in the humidity so it was a perfect day for picking and taking the fun tractor ride.


I ended up picking about $7.50 worth of blueberries, so about three pounds. While out in the field, Erin suggested making blueberry jam during naptime. My husband has always wanted me to can fruits and vegetables, especially ones from our garden or that I pick but I have never had the time. Since I used to be away at work from 7am-7pm and weekends were filled with standard chores, a little fun with friends and then a newborn last year, I was not interested.

Well, we did it..blueberry jam that is! Stay tuned :D


Thursday, May 17, 2012

Made by Me: Customized Kids Water Bottles

Why haven't I been blogging so much lately? Well, I am happy to "report" that my small business, Memorable Designs (on Facebook and Etsy) has been doing pretty well and keeping me busy! If you've been following me for awhile, you know that I spend alot of time with my Silhouette Cameo which is how I create, design and cut my creations. Initially banners were the most popular, but right now it is these cute 15oz BPA-free water bottles (only $7!!) that are taking the cake.

Before:

After:

Some of the cute designs:


I am about to do my second and third local show in town which is where children got pretty excited about the idea of picking their own design and having their name on a bottle. I have sent a handful of bottles up to my hometown (thanks "old" friends!) and to California. As I mentioned above, I charge $7 and a design (pretty much anything -- really!) and name are included. Shipping for one usually runs $3, but I check with USPS first before charging anyone.

Super cute birthday party gift, party favor, treat for a sports team, summer camp accessory, etc. Just send me an email (MemorableDesigns@gmail.com) or visit my Facebook page. Hope to fill an order for you soon!!

Sunday, February 19, 2012

Customized Wall Decal: Made by Me Monday

Good morning! Today is the first edition of Made by Me Monday where I'm going to share my crafty projects with you and hopefully you'll share some back in the comments section.

For Christmas I got a Silhouette Cameo and have been doing alot of work with paper and experimenting with vinyl. I made a decal for our laundry room and knew exactly what I wanted to do in the nursery. William's room has a great six foot nook (we also have one in the master bedroom) where we have a large chair for reading and playing. Soon enough it will be home to William's own round child-sie table and chairs.


I wanted to use words of inspiration and creativity, also things that William can do in his own little nook. Once I came up with the words, I designed the decal in Silhouette Studio and then chose colors based on the vinyl I had available. Since I used a variety of colors, I had to cut each word/image separately so I pieced it together on the floor first.


 After applying the transfer tape, the decal looked like this, backwards since it has to go on the wall correctly.


I applied the decal to the wall…..


…and then pressed it on with my little "credit card" presser. This step is important because it adheres the decal to the wall and prevents bubbles and tearing.


My favorite part is peeling off the transfer tape and seeing the finished product!


Ta-Da!!


I would love to help you design a decal for your children's room. Please stop by my Facebook Page or send me an email memorabledesigns@gmail.com


Monday, December 5, 2011

Holiday Craft #1: Handprint Tree

I have decided to make December craft month at Enjoy Life & Love because I already have some cute and festive ideas up my sleeve. I will share at least one holiday craft project per week. There are two children's projects, a fabric-related home decor project and a paper craft. So please make sure to come back each week (I'm going to try and post on Tuesdays) and get some ideas, share your ideas, and let me know what you think!

This week's craft was made with my favorite sidekick: William. This is not the first or the last time his Momma will be dipping his hands in paint for the sake of craftiness, but soon he will not mind! I will admit that I found this idea on Pinterest, it is not an original idea of mine.

I purchased a 9x12 canvas at Michael's on Thanksgiving night when I decided I wasn't ready for bed and not in the mood to watch football. All stretched canvas was 50% off and then I had a 30% off total purchase coupon which made everything an even better deal. I also purchased dark green paint since I already had the other colors at home.

I buckled the little guy into his high chair,


painted his right hand with green paint and then did my best to get a fingers spread flat handprint


….six times!


I added details later -- the red edges, brown metallic tree trunk and gold star. I love it!


Monday, October 17, 2011

Hand-me-downs?? Hand them Over!

If you don't "like" or "agree" with hand-me-down children's clothing, you aren't going to like this post, so just stop reading. I do not have any issues with second-hand clothing for William. Why? Well, I inspect it before I buy it, wash it before he wears it and save a whole bunch of money in the process!

Take the past week for example. There were two large community yard sales in town. At one, I picked up four long-sleeved shirts from The Children's Place and a pair of linen pants (size 18M for the summer) all for $3. A nearby church had a sale and I picked up something like three sweaters, two pairs of pants from Gymboree, 5 long sleeve shirts (two from Janie and Jack), and a dozen books for $6. Yesterday I went to TotSwap, a consignment sale, and got him a great three-piece shirt-sweater-pants outfit for $2.50 and a LeapFrog musical drum for Christmas that was $5 since Sunday are 50% off days.

So, you are right, I don't know exactly which size he will be when, but really, I still think I am on the winning end of these deals.

Monday, October 3, 2011

Halloween Footprint Ghosts

This is one of my favorite projects and it was William's first real craft. Here he is with the finished product:


To kick-off our Halloween decor, I decided to make ghosts out of William's footprints. I saw a similar idea in a magazine a while ago, but I made some modifications and made it even easier.

Materials you need:
baby or child
wood
saw
paints: black, white, yellow
paintbrush
Sharpie
numerical stickers

I started off at Lowe's and purchased one piece of wood and cut it at home into a few different size pieces. (I did different sizes because I made these for William's grandparents too, but I used one footprint instead of two.) I also picked up a can of $1 black spray paint. I covered the basement floor in newspaper and gave each piece of wood two coats of spray paint on each side and all edges.


Then, I put William in his highchair and painted the bottom of his bare foot white and stamped it on the wood. Now, the first time I did this, I dipped his foot into the paint and then stood him up on the wood, but this resulted in a messy ghost that wasn't hardly recognizable as a footprint. By painting his foot, I had more control over the amount of paint used and could also spread out his toes if that makes any sense.


While the paint was drying, I added some additional details: a yellow full moon and the year 2011 in 3D white sparkle stickers so I didn't have to worry about neatly painting numbers. Then, I drew faces on each ghost with a Sharpie.


I love how this project came out and want to do it annually. Once William has a sibling, I can use one foot from each of them to have a big ghost and little ghost. One of the best parts is, since it is wood, I don't have to worry about it getting ripped in a box, paper fading, etc. I can just sit it anywhere in our house until Halloween!


Saturday, July 9, 2011

Baptism party {the food}

Back to William's party!!

Typical of me to start with dessert first ;)
From the beginning I knew I wanted to do cupcakes rather than a cake. Granted I would have purchased the cake which would have been less work than making cupcakes (maybe), but I didn't want to have a bunch of leftover cake. I made cupcake toppers to make the cupcakes for festive. I designed the emblem with a cross and the words God Bless William in Powerpoint and printed two dozen. I did buy a scalloped punch, but when I used it, it worked in the reverse way that I needed if that makes sense. So, the individual trips to Michael's and Jo-Ann's and $30 spent didn't help. I resorted to cutting out each circle individually with scrapbook scissors. Same idea, more work. I used a drop of hot glue to adhere the toothpicks to the cutouts before adding a blueberry and topping each cupcake.


For the first time I finally decided to make a watermelon ice bucket! I saw this idea a long time ago (or so it seems) and I finally had a reason to do it. I used the watermelon on the fruit kabobs, which is why I had it. I hollowed it out with an ice cream scoop on Saturday and then kept it on the counter overnight covered in saran-wrap because I was worried about it smelling rotten. Well, it stayed fresh, so I filled it with plain ice cubes and special blueberry ice cubes I made. 


Sadly, this is the only food shot I have and it doesn't capture it at all. The party started and ended so quickly, and everyone was so hungry, that I didn't get the shot I wanted. We had beef brisket, pulled pork and hamburger sliders. Tossed salad, fruit kabobs, cheese and crackers, pasta salad, etc. I also made a few different drinks and put cute little tags on the pitchers to identify them. Stay tuned for the recipe for Fruity Mint Tea which was a hit!


Tuesday, March 22, 2011

Taggie Toy for Baby

This is a project I meant to complete months ago, but then I got distracted, which is par for the course. If you are a mom, or even if you aren't, you may have heard about "Taggies." Apparently children like tags on stuffed animals and other toys. Funny how this reminds me of cats and dogs liking empty grocery bags more than their toys, but I will withold judgement.

I bought 1/4 yard of this bright color striped fabric on clearance and then purchased 1 yard of three different coordinating ribbons. The total cost for material was less than $5.


I went with a raw size of 13x15 inches for the fabric portion of the Taggie which is because I liked that size, it wasn't too big or too small. I didn't use batting or any other filler, just the two pieces of fabric sewn together. But, before I sewed the pieces together I cut several pieces of 4-5 inch ribbon from each of my three colors: orange grosgrain, red satin, and lime green with blue dots grosgrain.


I folded the ribbons in half and pinned them around the right side of one of the pieces of fabric and then stitched them in place. Then, I added the second piece of fabric and stitched the two together. At this point, I couldn't see the ribbon anymore because the loops were "inside" the fabric.


When I turned the fabric right side out, I went around the edge with a tight straight stitch and wa-la, project is done! I have some extra fabric and ribbon so I will probably make another one because, well, why not?!


We Did it WednesdayBlue Cricket Design, The Handmade Hog, Somewhat Simple
Hookin' Up w/ HoH, Keep it Simple Sunday

Monday, December 27, 2010

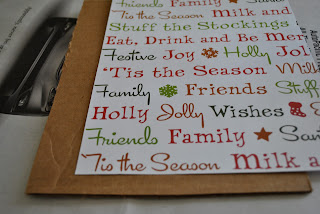
Christmas Card Saver

 How many years worth of Christmas cards do you have? My mom told me she has years and years worth, from when my college-age cousins were in elementary school. My husband and I began receiving cards as a couple in 2007 and I have the cards to prove it. Our friends have gone from singles to engaged and married and now their dogs have been replaced by children in their pictures.

I decided it was time to do something with our cards, and I came up with a pretty simple six step idea shown in the photos below.
1. Sort
2. Stack
3. Cut
4. Punch
5. Decorate
6. String

1. Sort. I did this by size and put 4x8 photo cards first then other photo cards (by size) and then all non-photo cards sorted by size.
 

2. Stack. I stacked all greeting cards by size so the smallest was on top and largest on the bottom.

3. Cut. Cut pieces of cardboard slightly larger than your largest card for the front and back cover.

4. Punch. Using a hole punch, punch a hole in the same corner of each card. To make sure mine were all in the same place, I inserted the corner of the card as far as it would go into the hole punch.

5. Decorate. Using scrapbook paper I already had, I cut sheets to cover the front and back cardboard covers (four sheets per year). 

I used Mod-Podge on the cardboard to adhere the paper to the cardboard and then used another layer of Mod-Podge on top of the decorative paper to seal it.


I used more cut paper and some alphabet stickers to label the books.


Front and back of my 2009 and 2010 books.


6. String. I used thin holiday ribbon to string the cards and covers together. Make sure to pull the ribbon tight before tying it off so there is less stress on the holes in each card and it all stays stacked better. I originally planned on using metal binder rings, but cannot find them sold loose anywhere.


I put our Christmas cards as the first card in each book and plan on putting out these books each year to see how much everyone has changed and remember those who are no longer with us. I think it will be fun to have out with the album of old Christmas pictures I made earlier this year.


Linking up: Making the World Cuter Mondays, Just Something I Whipped Up, Craftastic Monday, Motivate Me Monday, DIY Holiday Showoff, The DIY Showoff, Mad Skills, Get Your Craft On, Tip Me Tuesday, Blue Cricket Designs Show & Tell, We Did it Wednesday, Mid Week Mingle Blog Hop, Hookin Up with HoH, Paisley Passions, It's So Very Cheri, Craft Catwalk

Featured on Pinkapotamus