Pin it!

Follow Me on Pinterest
Showing posts with label craft. Show all posts

Tuesday, May 29, 2012

Made by Me Monday: Split Letter Tiles

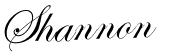
A couple months ago I started making these elegant split letter tiles using my Silhouette Cameo. I designed the split letter in the Studio software using the Regal font. They have been popular for weddings and housewarming gifts. The one in our kitchen has three names: my husband's, mine and our son's. I didn't include a date since we have been married almost four years and since William's name is on it, the date wasn't relevant.


This is one I made for a customer using a different font and brown vinyl instead of black. They are getting married this summer and this is a bridal shower gift, so we included their wedding date. I hope they like it!


Yes, these are available for sale too…just send me an email MemorableDesigns@gmail.com


Wednesday, February 15, 2012

I have an Announcement...

On this day, the day after Valentine's Day I have an announcement to make:
I am going to start a weekly post Made by Me Monday.


How is this going to be different? Well, for starters, I'd like for you to share with me things you've made in the comment section of these posts. My blog isn't "ready" for a Linky party yet, but it would be great one day. For now, we'll keep it casual. This will give me additional encouragement to share some of the craft things I have made on a weekly basis. It is easy to let blog posts get shuffled around when life gets busy, but I am going to stick to this. Hopefully, ti will also allow me to see some new things you have created without having to stray far from my own blog.

So that's all for now…time to make sure I have good photos for my first few posts!

Monday, January 30, 2012

Valentine's Day Projects {Silhouette}

I'm about to start sharing more crafts, I promise. I have been using my Silhouette Cameo practically everyday to create birthday banners, cards, invitations or create with vinyl. Earlier this month I did a few Valentine's Day projects (all available for sale with personalization via Facebook and Etsy).

First is my Valentine's Day subway art. The Silhouette Studio offers some ready-made files to use for this, but I wanted mine to be unique, I didn't want to visit another blog and see the same exact item in different (or the same!) colors. I decided what words I wanted to use, adjusted the fonts and layout in Studio and used red and pink vinyl mounted on a 12x12 piece of painted white wood.


For my second project, my favorite apprentice (check out Halloween and Christmas) was needed. I found some cute frames with heart cutouts and got to work painting and personalizing. Someone ordered one for a friend too and the friend loved it!


Saturday, January 7, 2012

My Business is on Facebook!!

This past week has been a busy one for me. You see, a few nights ago I launched Memorable Designs on Facebook. If you haven't "liked" it, please do!

In case you haven't been following Enjoy, Life and Love too long, I started a side business in August 2008 that I named Memorable Designs and used a blog and personal connections to promote my work. Keeping up this blog, the Memorable Designs blog, my personal email, my work email and my personal life proved to be a bit overwhelming so I got a bit slack on the blogging (other blog…is this confusing?).

As I have continued to grow my business creating photo books for weddings, babies, anniversaries and birthdays as well as video montages, I have started paper crafting again which is something I have liked to do for many years. In addition, you may have read that I got a Silhouette Cameo for Christmas (so exciting!!) so that makes my work much better, more detailed and more diverse. It also gives me the opportunity to design with vinyl which is alot of fun for me.

So as a bit of a business push, please think of me when you are planning baby showers or your child's birthday party and are interested in a coordinating banner, cupcake toppers, favor tags, etc or personalized party buckets, wall art, etc. I can't wait to start feeding my creativity even more and thanks for coming along on this journey with me :)

Wednesday, December 21, 2011

Holiday Craft #3: Christmas Scrapbook

For my third holiday craft I'm going to share with you an idea that I thought of last year but didn't get around to making until this year. Last year I focused on organizing our Christmas cards and made my Christmas Card Saver. This year, I made a simple scrapbook with one photo from each Christmas past. There are definitely holes in our childhood years since I have to rely on our parents for the photos, so I worked with what I have. Since each year is its own 8x8 page, it is easy to add and move the pages around.

I bought an 8x8 red scrapbook from Michael's on Black Friday and made a basic (I know its boring and needs to be jazzed up) "title."


I had stacks of Christmas paper from a few years back when I literally made Christmas cards. I also bought a few sheets of black number stickers at Michael's to make it look uniform. I printed the pictures at home and got started. I didn't do anything fancy with different scissors or embellishments, just kept it focused on the picture.


This is a great project that is fun to add to year after year.

Tuesday, December 6, 2011

Holiday Craft #2: Shabby & Chic Wreath

I finally got around to making a wreath!! I had purchased a wire wreath form some time ago, but hadn't made it a priority to actually do something with it…until now! As if I don't have enough Christmas decorations, I decided to use scraps of Christmas fabric from last year and turn it into a festive wreath. Try this for a pretty simple Christmas DIY decoration.

The fabric I used was: solid dark green, a white backed full of holiday phrases, lime and red stripe (used the most), a green, white and red snowflake, and a red fabric with holiday candy all over it.


I cut strips of fabric out of all the scraps I had. The strips were about 1.5 inches by 7 inches. Then, I just folded each strip in half, looped it around the metal, pulled the double end through the loop and pulled it tight!


To be honest, I have no idea how much fabric I used, but I think it ended up being about 225 strips. Since I didn't know if I would have enough or not and I wanted a random look, I made sure to rotate the wreath form and placement of the fabric as I was making it.

This was a nice and clean project, all you have to do is cut fabric, and I even did it during playtime. I hope you find some time to make your own wreath!


Monday, December 5, 2011

Holiday Craft #1: Handprint Tree

I have decided to make December craft month at Enjoy Life & Love because I already have some cute and festive ideas up my sleeve. I will share at least one holiday craft project per week. There are two children's projects, a fabric-related home decor project and a paper craft. So please make sure to come back each week (I'm going to try and post on Tuesdays) and get some ideas, share your ideas, and let me know what you think!

This week's craft was made with my favorite sidekick: William. This is not the first or the last time his Momma will be dipping his hands in paint for the sake of craftiness, but soon he will not mind! I will admit that I found this idea on Pinterest, it is not an original idea of mine.

I purchased a 9x12 canvas at Michael's on Thanksgiving night when I decided I wasn't ready for bed and not in the mood to watch football. All stretched canvas was 50% off and then I had a 30% off total purchase coupon which made everything an even better deal. I also purchased dark green paint since I already had the other colors at home.

I buckled the little guy into his high chair,


painted his right hand with green paint and then did my best to get a fingers spread flat handprint


….six times!


I added details later -- the red edges, brown metallic tree trunk and gold star. I love it!