Pin it!

Follow Me on Pinterest
Showing posts with label recipe. Show all posts

Wednesday, October 17, 2012

Halloween Hat Cookies

Earlier this month I hosted a costume swap for our local MOMS Club. I decided to provide some Halloween treats, but did not go overboard since all of the attending children were toddlers or babies. Let's be serious, the cookies were for the Moms :)

All I had to buy for the cookies was a pack of fudge stripe cookies and a pack of Hershey's Kisses. You also need honey and "writing" frosting, but I had both of those.

As you can see, the stripe side of the cookie will be face down on your plate/tray. Put a small dollop (I like that word) of honey on the bottom of the Hershey Kiss and then push onto the cookie, covering the hole. I let them sit overnight to "stick" better.


The next morning I used a small tube of yellow writing frosting to make a ring around the edge, where the cookie joined the kiss.


Then I added little buckles to the witch's hats.


The cookies were yummy and people thought they were so cute! :)

Saturday, June 23, 2012

Blueberry Jam!

Let me first say that if I could do this during naptime, you could too. I did have help, so a friend helps speed along the process, especially a friend who has made jam before. We used the blueberries we picked that morning and found a simple recipe in my classic Better Homes and Gardens cookbook for Blueberry-Orange Jam.

Before you start, I will tell you that this uses a few pots and pans at once. We had a pot going to sterilize the jars. We had a pot to actually make the jam. Erin was manning the stove, keeping water boiling, etc while I was doing the fun part of crushing berries and mixing it together.

Recipe:
3 pints blueberries, stems removed (1 pint = 2 cups)
1T orange zest
1/4c orange juice
1 package powdered fruit pectin (typically 1.75oz)
1/2t butter or margarine
4c sugar (I didn't have enough when we started and had to run to CVS in the middle of cooking. that's where you go when your town doesn't have a grocery store…)


1. Place 1c berries in an 8qt pot. Use a masher to crush berries. (I did all of my berry crushing in an aluminum pan because my stove and best pots were in use!) Add berries until you have 4c crushed. Stir in orange zest, orange juice, pectin and margarine.


2. Heat on high, stirring constantly until you have a full rolling boil. Add sugar all at once. Return to boiling; boil 1 minute, stirring constantly. Remove from heat and quickly skim off foam (I didn't have foam).

3. Immediately ladle into hot sterilized half-pint jars, leaving 1/4 inch headspace. Wipe jar rims and adjust lids. Process in boiling water canner for 5 minutes. Remove jars and cool until set. Makes 6 half pints.


Saturday, June 9, 2012

Grilled Cheese with Strawberries {recipe}

As strawberry season continues in Maryland, I find that William and I are at a nearby farm picking at least once a week. The first time we went he did actually pick…and bite and put into our box…regardless of being slightly under the weather.

The second time we went to a different patch on the same farm and they had just lined the rows with straw so he was running up and down the rows the whole time. Since strawberry plants are short and I could see him, I just kept picking and let him run wild. Let's be honest, it was easier too. I only had my video camera the second time so no photos to share.

I found myself thinking what to do with all our fresh, juicy strawberries besides eat them whole, add to ice cream and lemonade and freeze for a cool treat. I found a great recipe from Southern Living (no surprise I liked it!) For a Goat Cheese and Strawberry Grilled Cheese sandwich.


If you take a look at the recipe, it calls for seven ingredients. I omitted the salt/pepper, pepper jelly, and basil since I didn't have any in the garden. I also substituted spinach for arugula since we had that growing outside. The flavor of my sandwich was absolutely wonderful and I'm sure it tastes great with basil and arugula since they are both such strong flavors. Then again, I think my version with bread, spinach, strawberries and goat cheese was a wonderful balance of the rich cheese and sweet berries.

Please share your favorite strawberry dish!

Wednesday, March 21, 2012

Cinnamon Apple Croissant {recipe}

My friend Stevie posted a recipe she found on Pinterest (she loves Pinterest) for Cinnamon Apple Croissants. When I saw them, I started to drool and made them soon after. Actually, Stevie's oldest brother was at our house visiting the weekend I made these. Always try to do something a little different when guests are in town! I'm linking to the original recipe and just going to share my pictures with you.


Tuesday, January 17, 2012

Scallops with Tomato & Papaya

I cooked this recipe a month or so ago right after I purchased a papaya at Costco because William loves melon. The recipe comes from the March 2011 issue of Ladies Home Journal, one of the magazines I subscribe to.

Ingredients:
4T canola oil
12 medium scallops
1T minced garlic
1T cumin seeds
1/2t Spanish paprika
1/2t ground coriander (I did not use them)
1t kosher salt
1c cherry tomatoes, halved
1 medium ripe papaya, cut into bite size pieces

Heat oil in large skillet over medium-high heat. Add scallops and sear, about 2 minutes per side. Remove scallops and set aside.

Heat remaining oil in skillet. Add garlic and cook for 10 seconds. Add cumin seeds, paprika, coriander and salt and cook for 5 seconds (release the scent).


Stir in the tomatoes until they are tender, about 5 minutes. Add the papaya and cook for 3 more minutes.


Add the scallops to the sauce in the skillet, stirring gently to coat. Serve over rice.


Review: This recipe was great (if it wasn't I wouldn't take the time to share it with you!). The recipe came from Bal Arneson, who is apparently known as the "Spice Goddess" on The Cooking Channel. It tasted a little bit like Indian food and probably would have tasted different if I used the coriander, but it is pricey and I never took with it. I can't wait to serve it to guests since my husband and I liked it so much! 

Let me know if you have recipes that use scallops, because I'd like to cook with them more.

Thursday, August 4, 2011

Fresh Cherry Pie

I know I said I don't bake, but here I am, at it again! This is only the second time I have made cherry pie (the first being Thanksgiving) and the first time I used canned cherries since they weren't in season.

I used this recipe from The Food Network with a few tweaks (in parentheses):

  • 4 cups fresh or frozen tart cherries (I used fresh and had to pit them by hand!!)
  • 1 to 1 1/2 cups granulated sugar (I compromised and used 1 1/4c)
  • 4 tablespoons cornstarch (my small local grocery was out of cornstarch [not kidding] so I used tapioca mix since other recipes call for it)
  • 1/8 tablespoon almond extract
  • Your favorite pie crust or pie dough recipe for 2 crust pie (I used Pillsbury refrigerated dough)
  • 1 1/2 tablespoons butter, to dot
  • 1 tablespoon granulated sugar, to sprinkle

Directions

Place cherries in medium saucepan and place over heat. Cover. After the cherries lose considerable juice, which may take a few minutes, remove from heat.  I cooked mine for about 10 minutes. 
In a small bowl, mix the sugar and tapioca together. Pour this mixture into the hot cherries and mix well. Add the almond extract, if desired, and mix. Return the mixture to the stove and cook over low heat until thickened, stirring frequently. SIde note: The cherry mixture is DELICIOUS at this point so you might want to start off with extra cherries since you may be eating a few while the mixture is thickening. This took me 8 minutes. I think if you cook off less juice in the previous step, the mixture will thicken more quickly. Remove from the heat and let cool. If the filling is too thick, add a little water, too thin, add a little more tapioca. I added 1T of tapioca at this point. The mixture does thicken considerably once it cools!

Preheat the oven to 375 degrees F.
Use your favorite pie dough recipe. Prepare your crust. Divide in half. Roll out each piece large enough to fit into an 8 to 9-inch pan. Pour cooled cherry mixture into the crust. Dot with butter. Moisten edge of bottom crust. Place top crust on and flute the edge of the pie. Make a slit in the middle of the crust for steam to escape. Sprinkle with sugar.

Bake for about 50 minutes. Remove from the oven and place on a rack to cool.


mmmmmmmm DELICIOUS!!

Thursday, July 21, 2011

Zucchini Pineapple Bread

You read that right: Zucchini Pineapple Bread. In Maryland, everyone's zucchini are growing like mad and a family member gave us a few of his. On top of the ones we have, we can't eat them fast enough and last year's freezing didn't go so well so I decided to try something new.

I don't usually bake from scratch and I was reminded of some of the reasons while prepping this recipe. I had to use two bowls, one for wet ingredients and one for dry making more to cleanup. I also had to use my hand mixer and used my food processor to shred the zucchini so I had to clean an addition two tools. It wasn't as bad as I thought since it went in the dishwasher, but it sure did take up alot of space!

I used this recipe from Cooking Light because hubby doesn't like nuts in bread and most zucchini bread recipes call for nuts. We love pineapple and I was hoping it would make the bread a little sweet. Since I had all of the ingredients, I made this on a whim and am happy I did!

Here are a few "process" photos:


I was debating about halving the recipe since it yields two loaves, but I decided that if I was going through all the trouble of making it, I was going to make two...one for now and one for later! It came out tasting great and I would certainly do it again. Here are some photos of the process. Let me know if you try it or have suggestions for a garden overrun with zucchini!!

Saturday, June 25, 2011

$11 at Harris Teeter

Yesterday I stopped by Harris Teeter to pick up a few grocery items. I will preface this by saying that the trip was not on a whim and not for my weekly shopping. William is being baptized on Sunday so after the service we will be having more than a dozen adults and a handful of children over for lunch. Only one other time have we had that many people over and I did not have a newborn, but I digress.

I get Harris Teeter's eVIC emails since I am part of the program and shop their regularly. I received one the other day that told me a few things:
raspberries BOGO
shredded cheese BOGO
asparagus $1.99 (instead of $3.79)
Texas Pete 10/$10
Coupons doubled up to $1.98 face value (usually it is only $0.99)

After doing 98% of my party food shopping at Costco earlier this week, I went to Harris Teeter to get a few last minute items and some of these newer things that caught my eye. I was armed with my short list and my coupons. Here is what I bought:

The Hershey syrup wasn't on my list, but I remembered my husband requested it for chocolate milk so I added it to the basket.
The total cost of my purchase was only $11.27!! How did I do it?? Why, let me tell you :)

- If items are BOGO or x/$x at Harris Teeter, the price divides out. So, I only bought one container of raspberries which is all I needed, and paid $4 instead of $8
- The asparagus was only $1.99 which is a discount of nearly $2. Why is it always so pricy??
- The Texas Pete was $1 for the bottle, plus I had a $0.40 coupon that doubled so it only cost $0.20
- I bought the salad dressings in case guests don't like what we have here on Sunday and because they were BOGO at $3.25 and I had a $1 coupon that doubled so I got two dressings for $1.25
- The shredded cheese s good on top of hot tomatoes, pizza, salad, etc and since it was $2.79, but BOGO, I only paid $1.40
- I needed the concentrated OJ ($1.67) and lemonade for one of the beverages I am making Sunday and the lemonade one was less than $1
- The Nabisco Triscuits were BOGO $3.89 and I had a $1 off coupon that doubled so I got both boxes for $1.89.
- And then there is the Hershey syrup that did nothing for me except add $2.29 to my total.


My receipt says that $24.36 in coupons were redeemed because a few of the in-store deals are considered eVIC coupons. In reality, it was $16.31 VIC savings and $8.05 in coupons.


Yes, I am pleased with myself considering I got fruits, veggies, dressing, crackers, cheese and salad dressing! AND I am done shopping for the party!

Friday, May 13, 2011

Five Ingredient Roast

Last week I made a great five ingredient roast from the blog, A Year of Slow Cooking which was recommended by my friend IRL Emily who frequently uses her crockpot for all sorts of recipes.

The recipe calls for five ingredients, all of which I had at home since we have a deep freezer full of meat. My husband has farmers in the family so we pretty much purchase one year's worth of red meat in February.

Ingredients:


3 pounds beef roast (mine started frozen)
1/3 cup molasses 
1/3 cup dijon mustard (I used honey dijon since that is what I had)
1 teaspoon garlic powder
2 tablespoons white or apple cider vinegar (I used 3T)

Instructions:
Toss everything into the slow cooker (the best part of using this cooking method in my mind). Turn the roast over a few times so there is some sauce/seasoning on both sides. 


Cook on low 6-8 hours or on high for 4 hours.


I cooked ours for about 7 hours and we got six or so servings out of it. Let me know if you try this or have another good suggestion -- love the tips!!


It's So Very Cheri, Not Baaad Sundays,  Sundae Scoop

Thursday, February 24, 2011

Bakerella's Cake Balls

Years ago, my cousin Kate who doesn't cook, or at least she didn't used to cook, raved about a blog called Bakerella. I have been reading the blog regularly, getting all sorts of great ideas, but wndering when I, a young wife who doesn't regularly have large groups of people over, would be able to make some of these awesome creations. Well, I did it.

I will admit, I started with the basic cake balls, but it was a start. This past weekend we were having friends over with three young children who I knew would get a kick out of the bite size treats. I intended on using green and white chocolate, but my dear husband who picked up the ingredients for me, only found milk chocolate. Bless his heart, I didn't complain! So they went from St. Patrick's Day themed to basic with some decorations.

I already had cake mix and batter in the pantry, as well as some sprinkles and powdered sugar, so I only bought two bags of melting chocolates which was less than $5. I baked the cake according to the standard directions on the back of the box. Once it was cool, I broke up the cake and transfered it to a glass mixing bowl and started turning it into crumbs (my cat appreciated the bits that fell on the floor).


I gradually added vanilla frosting while mixing because I've read mixed reviews about using 1/2 can of frosting versus a whole can, etc. When all was said and done, I used a little more than half. Once it seemed pretty well mixed, I dug in with clean hands to "smush" it all a little more.


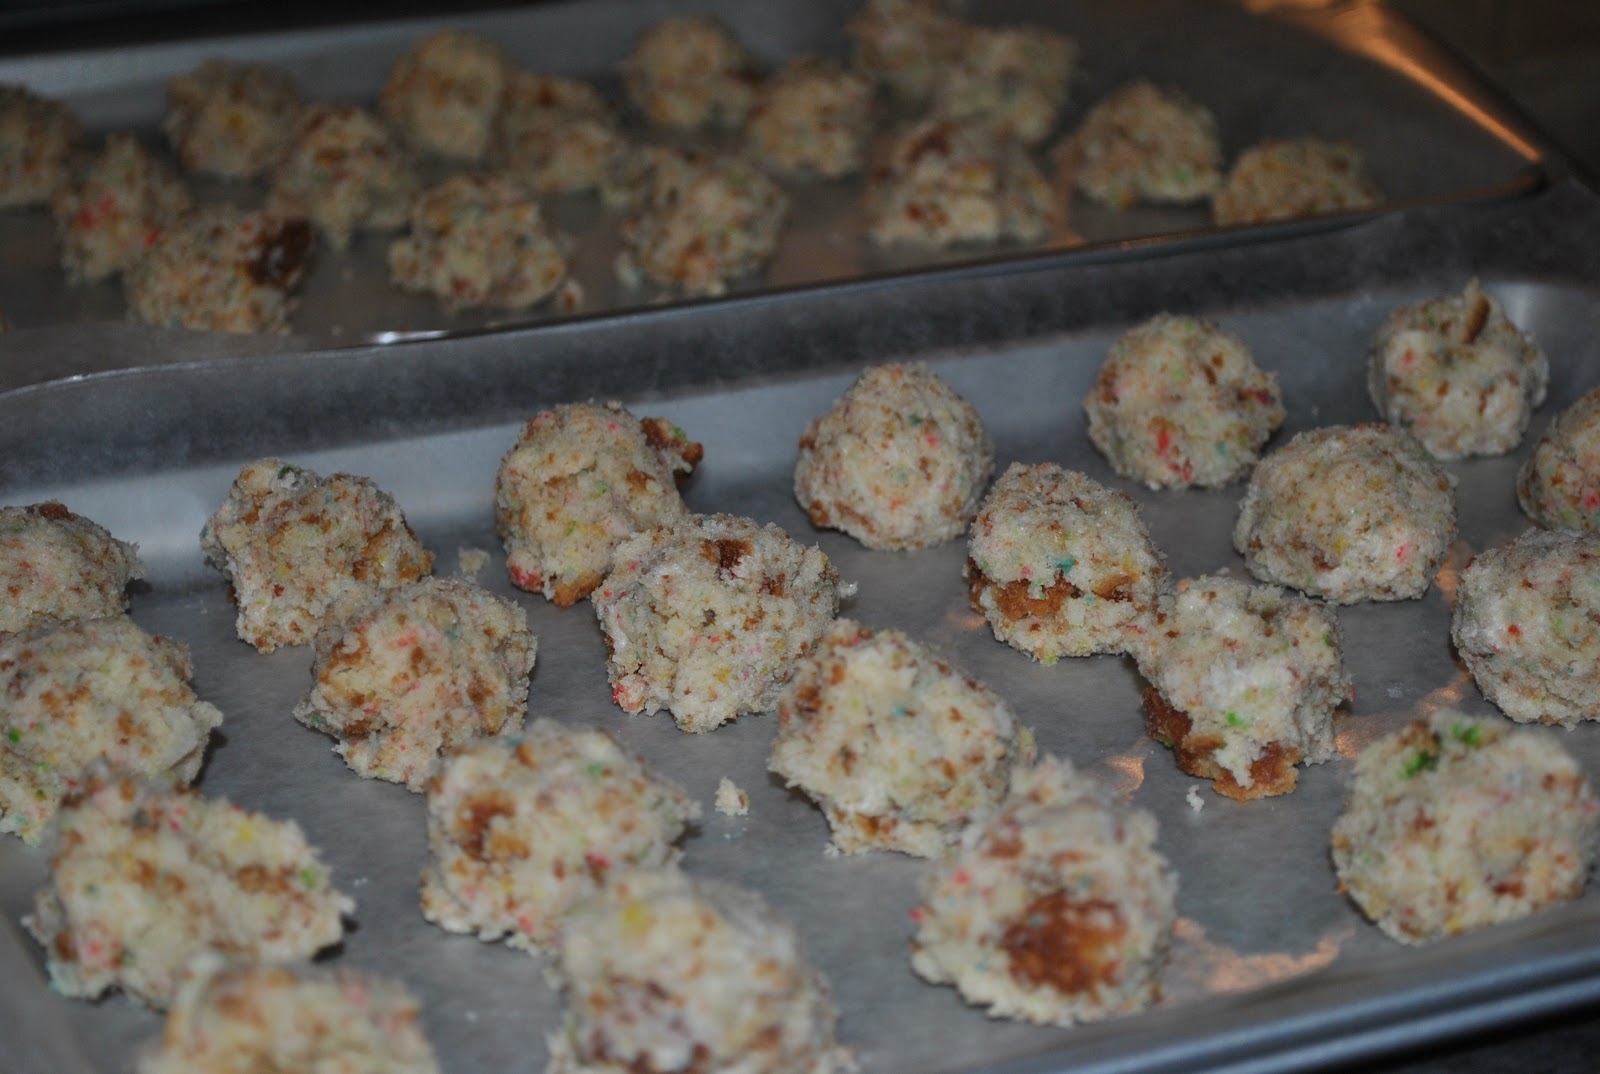
Then you start rolling. If you like making meatballs, you'll be good at this. Oh and it is nice that you are playing with cake, not raw meat. I probably could have made my cake balls a little smaller so they were more bite-size for children, but I learned for next time! I just lined two cookie sheets with wax paper to make clean up a breeze and started rolling.


I got three dozen cake balls out of my one cake. I put the trays in the refrigerator overnight, since pregnant ladies get so tired ;), so they would stick together.

The next day I melted the chocolate wafers and placed 3-4 balls in the bowl at a time to coat with the chocolate.


Once coated, I transferred to wire cooling racks and added sprinkles or powdered sugar while the chocolate was still wet. I did keep some plain, but I knew the kids would like the decorated version.


I put about half of them in the freezer so I have an easy way to satisfy my sweet tooth. My husband really liked them so I will be making them again...hopefully I will take on a more creative version that doesn't look like an elementary school student made them :). I can just see myself hosting birthday parties, playgroups, etc and serving up all sorts of fun treats!


It's a Keeper, HoH, Get Your Brag On, Somewhat Simple, Weekend Wander, I <3 Naptime, Weekend Wrap Up Party