Pin it!

Follow Me on Pinterest

Saturday, December 25, 2010

Christmas Past

Not too much text in this post since it is Christmas and I have plenty of relaxing and celebrating to do (confession: I did not actually write this post on Christmas Day). Earlier this year I started an album of old Christmas photos of my husband and I. I am going to take it out every Christmas when we put up the tree and add photos every year. We are still gathering our childhood photos, but here are a few from then and a few from the more recent years - enjoy!!

my precious husband at 5 months old

2 years old

5 years old 
(Mom, if you still have that nightgown, it is probably worth some $$ now!)

8 years old
Yes, our pajamas coordinated, I know.

1st Christmas with my boyfriend >> husband


1st married Christmas 
(At my in-laws since we didn't have a tree in our apartment)

2009 family gathering

2010 Christmas card


Thursday, December 23, 2010

Holiday Table

As I mentioned in my previous post, our dining room table was the first thing decorated in our home this year. We do not use this as a formal dining room, but a place to eat everyday because we have a pretty laid back style at home. I actually prefer an everyday dining room, otherwise, why spend all that money on furniture you rarely use?!

I purchased a new tablecloth and runner from Homegoods this year. My mom also sent another runner and the gold placemats you see below. We have an 8 foot old barn wood table so I have to buy large oblong tablecloths to cover the table. I started with the cream/gold tablecloth that I loved as soon as I saw it.


The scalloped red runner has holly cutouts all along it with gold thread, which compliments the gold tablecloth.


These glass candle holders were a gift from a relative last year at our Christmas open house. The silver candlesticks are from Pier 1. Surprisingly I did like the silver candlesticks with the gold tapestry, but it didn't seem to be "enough."


I transformed the candle holders with a bag of unopened cranberries from Thanksgiving! I split the cranberries between the two vases and the red immediately made it all come together.


This is what it looked like before the placemats from my mom.


Looks much better after, don't you think?!


And finally is the garland framing our double windows. most of the garland I found in stores was boring, too skinny and not what I was looking for. Well I feel like Black Friday at Michael's was my lucky day because that is when I bought two strands of this:


I suppose the garland can stay up for awhile since it is more "winter" than "Christmas", but we'll see. Sadly, everything else with a tree will be coming down in the next ten days (sigh). Time to go enjoy it while I can!


Friday, December 17, 2010

Christmas in Our Home

I realized that although I started to decorate for Christmas right before Thanksgiving, I had not posted any photos nor have we had guests over each weekend to enjoy the holiday decorations like we did last year. My husband has encouraged me to invite friends over, but things are a little out of sorts right now with my decreased energy levels and inability to do everything on my own like I was used to because I liked it that way (Please note: This has nothing to do with the helpfulness and resourcefulness of my husband. He'd do everything for me if I'd let him!).

Here is a holiday tour of our home this year starting with the front door. My mom made this wreath for us in 2007 when we were renting our first home. She bought a plain wreath and added the colored embellishments. There is a holly and sprig of gifts/balls for each color.


When you walk through our front door we have an open foyer where this handmade refinished table sits. This cute little Santa is a new purchase this year (Black Friday deal at Michael's) and so is the candy bowl (Homegoods). I also have a beautiful musical ornament on this table from a dear friend.


Our staircase is an L-shape so on the platform we have a small tree, a 2009 gift from my mom. The tree came with lights and some red berries, but once again, she got creative and purchased white sparkled poinsettias and some gold "berries and leaves" to customize it. Here is what it looks like in the day and at night.

  
In our kitchen I put out a few seasonal items including this cute marshmallow-roasting snowman, a frame, some holiday napkins and candles.


Our dining room table was the first thing that was decorated. I'm going to do another post on that, so here is a wider shot of our dining room. The garland around our double windows was also a Black Friday purchase at Michael's. It is two separate pieces and s really pretty up close with some pine cones and "snow" on the ends of the needles.


Christmas cards - I love them! It seems that people are a little later this year than in the past, but that means we are averaging more than five per day which is always exciting! We always look at the return address first and "split-up" who gets to open them. That way we both get to enjoy it. This year I did something easier and more traditional than last year - trim the doorframe. I am putting all photo cards on the dining room side and all traditional cards on the living room side. That way we can enjoy them from both rooms! Here is a close-up of some of the cards.

Then of course is our beautiful Christmas tree from Gaver Tree Farm in Mt. Airy, Maryland. This year we went with a Canaan Fir and the shape and size is perfect for us! I bought more lights (Black Friday at Lowe's) so there are 400 white lights this year and I also used new 2.5" red sparkly ribbon (Black Friday at Michael's). We bought our knitted tree skirt and angel in 2006 for our first Christmas together.


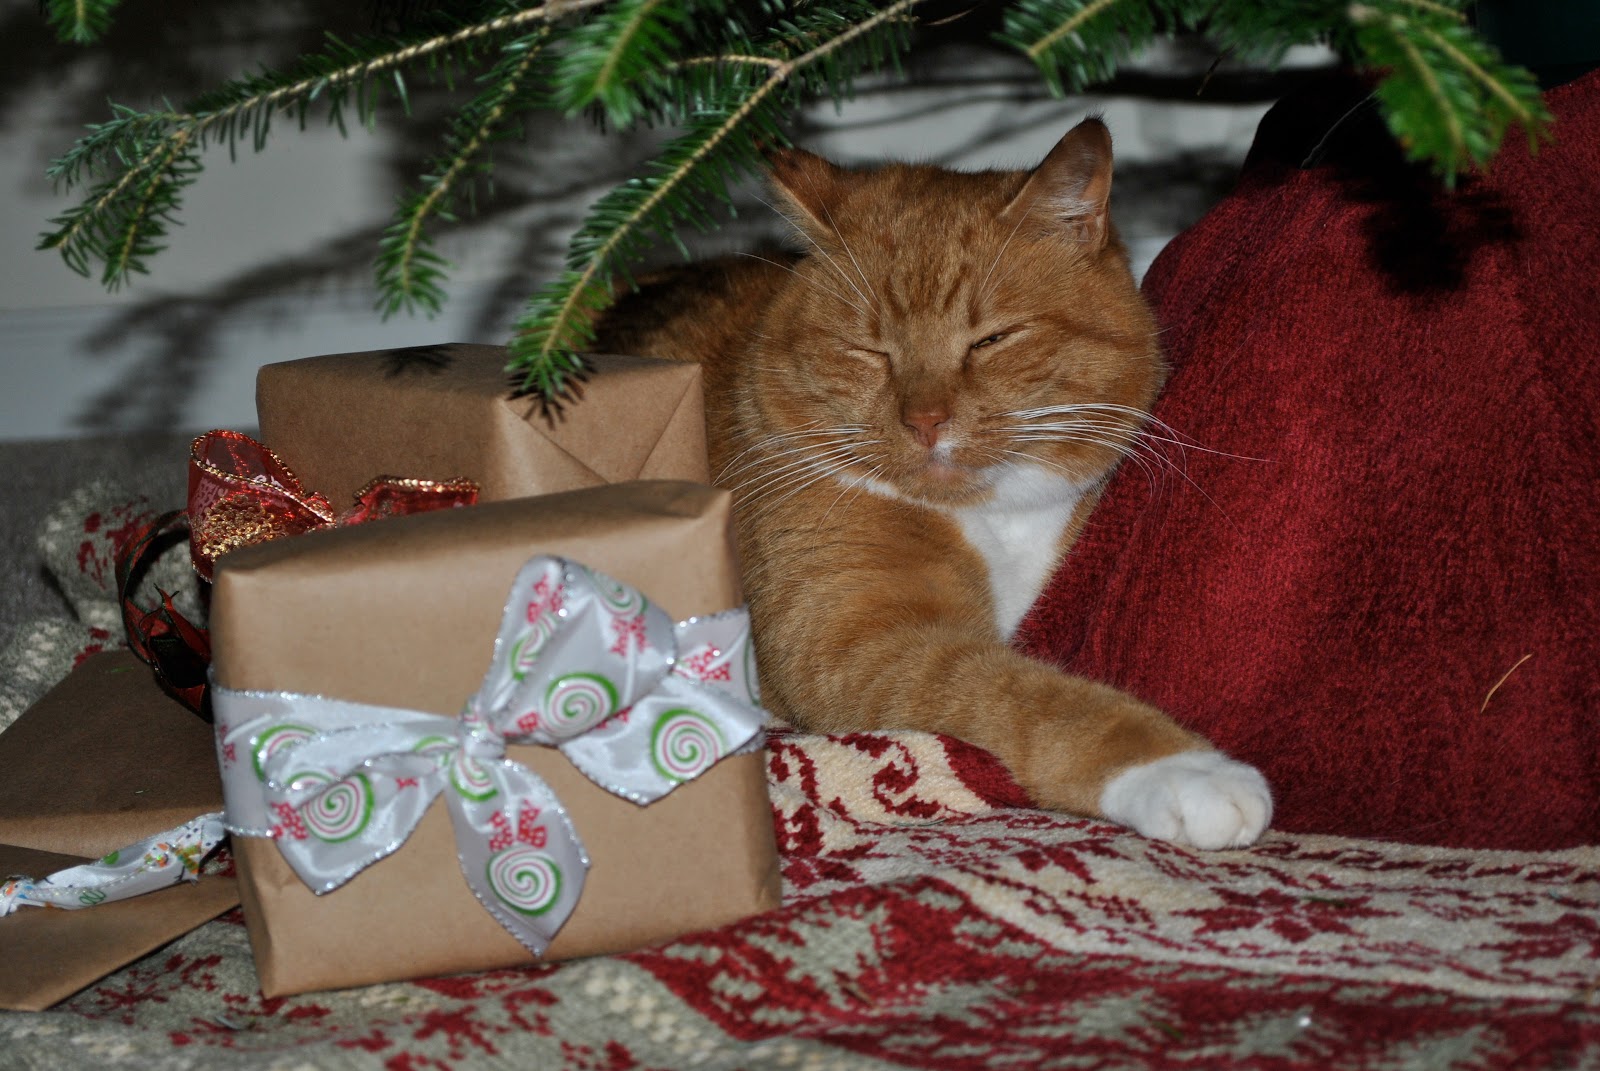
And of course, under the tree the gifts have been growing! I shared my gift wrap plan for the year last month and am happy with the way everything is looking. Even the cat likes it!


I hope you have had fun decorating and enjoying your home during the holidays!!


Saturday, December 11, 2010

6 Months

It seems like yesterday that I had six more months to be pregnant, but now I am six months along - where did the time go?! Technically, As of today I am 24 weeks 5 days, but I haven't had a chance to publish this post since I was traveling for work.

23w5d

24w2d

Weight: +16 pounds. I continue to go to the gym for a little bit at lunchtime when I’m not too tired to move.

Maternity Clothes: Oh yeah!

Sleep:  Some nights I am not sleeping very good. I wake up and switch from my left to right side in the very early morning hours and am putting an additional pillow behind my back to prevent me from rolling over onto my back since it isn’t good for me or the baby at this point.

Best Moments: Whenever I talk to my belly or rub my hands on it, the baby moves around. I like the frequent early morning and evening kicks.

Movement: All the time! I’ve seen people post that they were surprised to feel ten movements in an hour and I feel that in as many minutes many times. The doctor did say that the movements will become less as the baby grows and has less space inside.

Cravings: I really the sweetness of fruit, but the doctor did tell me that fruit is high in sugar and may affect my diabetes test. We’ll see…it is better than a lot of other foods I could be eating!

Gender: Surprise, remember?!

Labor Signs: Nope. I did have some muscle pain after “running” to the train. Let’s just say I need to realize that even if I feel good, I need to move more carefully than I used to.

Belly Button: In (still!)

Looking forward to: Daddy is picking up your dresser at the furniture store today! Potentially picking out a gender neutral Christmas outfit for next year at the after-Christmas sales J

Milestones: I have really changed shape since week 20. The baby and additional weight is still centrally located, but I have become much more round. At my 24 week appointment on 12/9 the baby’s heartbeat was 150 bpm and he/she was kicking the microphone. 

Monday, December 6, 2010

Ruffle Apron

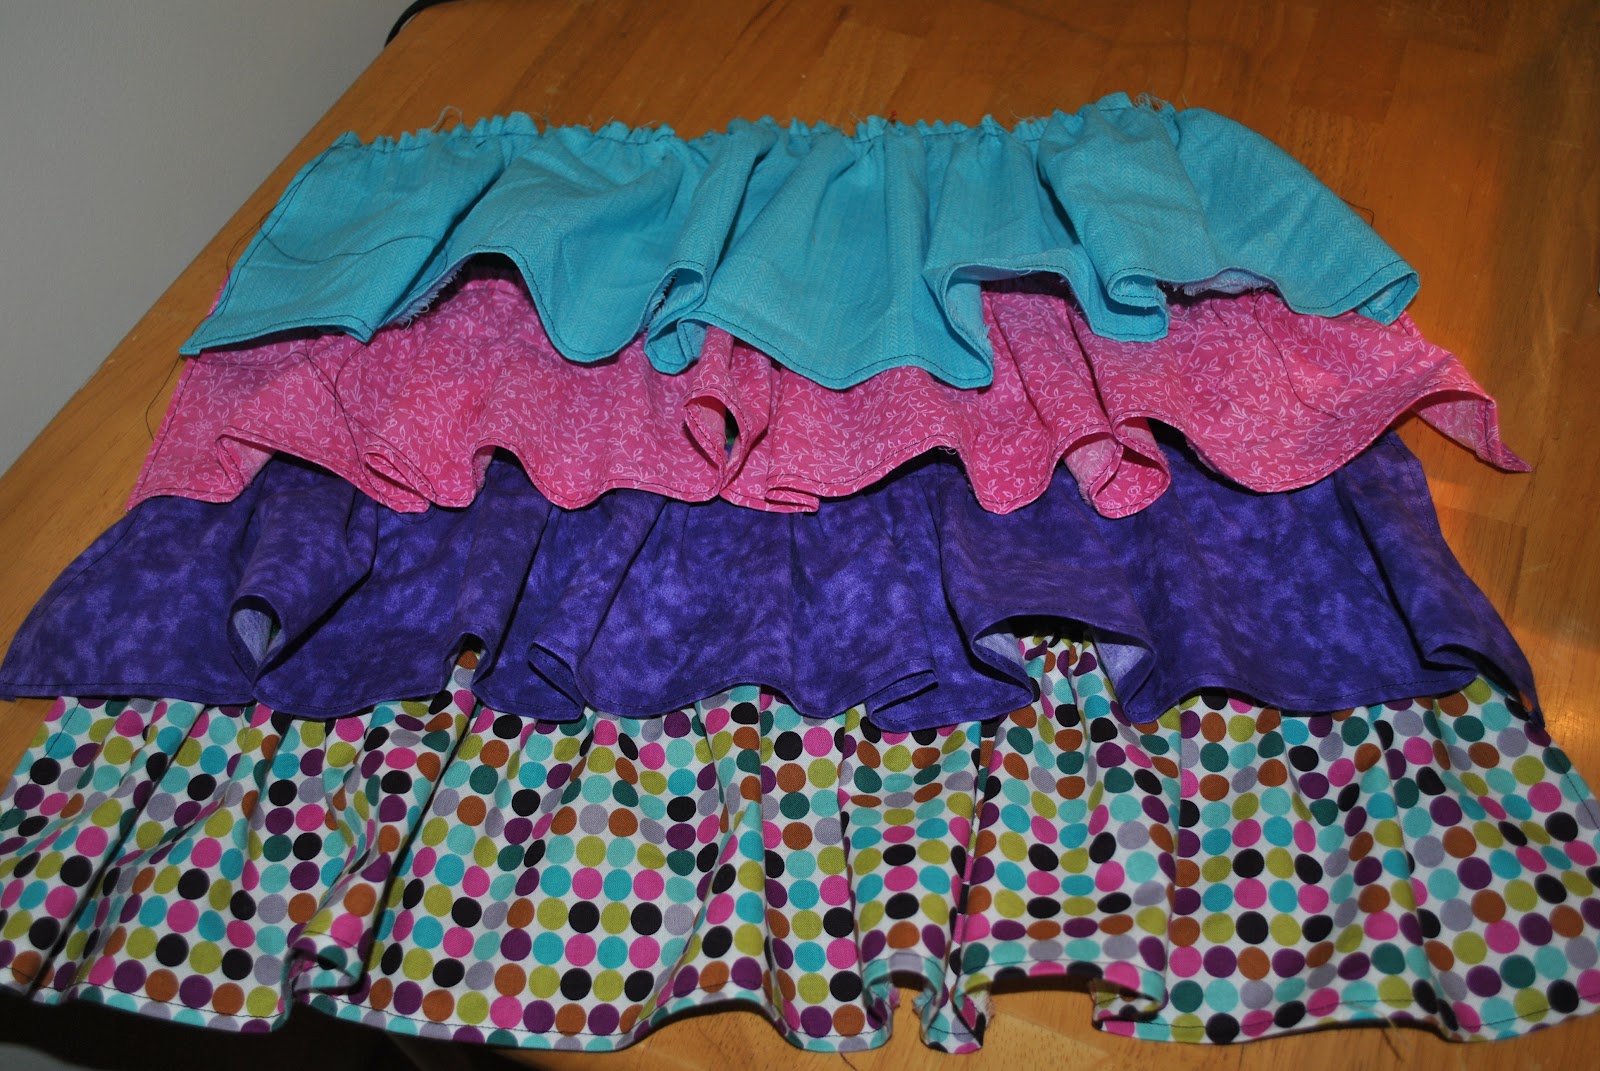
When I saw a post on Everyday Celebrations about a ruffle apron, I got quite excited. I haven't been doing too much with my sewing machine lately besides baby blankets and some basic projects, so I decided I would make two of these: a Christmas one for myself and one for my sister's 22nd birthday. I am using photos of the non-seasonal apron since to be honest, I haven't started my Christmas version.

I always find that the most time consuming part of sewing is washing, drying, removing frays, steaming and pressing the fabric. When it comes to the pinning and actual sewing, it is a breeze, but all the prep is what kills me sometimes. Just to warn you, this is one of those projects (at least it was for me).

I selected four coordinating fabrics for my sister's apron, starting with the multi-colored dot pattern. I then pulled out colors to accent them and liked the purple, turqoise and pink best. Since I only had to purchase a quarter yard of three fabrics (the purple, teal and pink ones) and 5/8 yard of the dot fabric, for a ruffle and the ties, it can easily be a very cheap project. The Christmas fabric I bought for my apron was all on sale 50% off so the materials cost less than $7 (sneak peak of my fabric below)!


Once all of the fabric was cut to the measurements here, I pressed a 1/4 inch seam on each ruffle on one long end and both short ends. The bottom ruffle (the one that matches the ties), is only pressed on one long end. Then, I used a basic straight stitch to hem the three pressed edges of each ruffle.


Actually creating the ruffle was the most exciting part since I had never done it before. I did not buy a gather or ruffle foot for my sewing machine either. All I did was increase the tension almost to the max and increase the stitch length to the max. Since I left long threads on both ends, I was able to pull on the thread and create my own ruffle by moving the fabric. This worked in my favor because I laid out the four ruffles on the bed and adjusted them to all be the same length once ruffled.


I then started the process of pinning, pressing and sewing each ruffle onto the solid back fabric, pressed into thirds so the ruffles were evenly spaced. You place the ruffles from the bottom to the top. The bottom ruffle (dot fabric) was pinned with the top of the ruffle along the bottom of the solid panel, right sides touching. Once you sew it in place (I used a straight stitch) you need to flip the ruffle over so it looks like it is laying the correct way. Press the top of the ruffle and then sew again to help hold it flat (I used a zigzag stitch). Pin the next two ruffles on the appropriate "pleat" on the backing, sew, press, and sew again so the backing lays flat. You will be sewing the top ruffle to the top of the backing with the wrong side of the ruffle touching the backing. If you do this correctly, the top raw edge of each ruffle will be hidden, except for the fourth one.

To read more detail about the process of pinning, sewing, pressing, etc of each ruffle layer, please visit the original post because it is a little bit "involved," but not as complicated as it seems.


Now, go back to the fabric you want to use for the band across the top of the apron which should match your ties and bottom ruffle. I must admit that I did try to take some shortcuts so I improvised along the way. I folded the band in half, pressed it and then pressed it at about 1/4 of an inch on all four edges. Then I pinned it into place, over the top ruffle to hide its raw edge.


I planned on using a single zigzag stitch to hold it in place, but it wasn't enough, so I added another row. at the base of the band.


I also modified the size of the ties because my fabric length wasn't quite right. They ended up being 3.75" x 36" which made the ties more narrow than the band, which I think looked nice. Copying what I did to prepare the top band, I folded each tie in half, pressed it and folded under each raw edge about 1/4 of an inch. I then closed up each band with a single straight stitch around three edges (not the folded one). Now to attach the ties to the band, I inserted them a little bit into the pocket that was created by the band being folded in half (seen below), pinned and then used a zigzag to close it up. Although I might not be explaining it the best way, this was easier for me than the original instructions which suggested turning the fabric inside out, etc.


My final product was ready to be sent to my sister in time for her birthday!!! If only she'd send me a picture of her wearing it.... :)


Making the World Cuter, Just Something I Whipped Up , Sew Can Do, What I'm Making Monday, Sew Chatty Made with Love Monday, Market Yourself Monday, Get Your Craft On, Whatever Goes Wednesday, We Did It Wednesday!, It's Sew Stinkin' Cute, HoH, Frugalicious Friday

Wednesday, December 1, 2010

Reverse Caramel Apples

Happy December!! I thought I'd start off the month with an easy recipe that is a great way to spruce up dessert!

On Saturday we had two good friends over for the evening and to watch the Clemson-USC football game (no I do not want to discuss the results). I always take advantage of having additional guests at our home to try new recipes that I wouldn't necessarily do on a "normal" night since we don't get home from work until 7 p.m. This time I opted for dessert when I saw this post from Random Thoughts of a SuperMom. I did modify it to make it easier and use a different ingredient. For the record, you will notice that some of my posts coming up are not my original ideas, which is why I link back to the owner...I have no qualms about admitting that I got the idea from them!

I started with four apples (3 granny smith and one leftover from the orchard down the road). I cut off the tops of each apple and then cored it using a knife and grapefruit spoon with the "spikes" on the end. I could not find caramel chips for the life of me, so instead I bought bits of Heath Bar which I suppose technically made them toffe apples, not caramel apples. I also bought a small bag of already crushed nuts, like the kind for ice cream sundaes, so I didn't have to crush up anything.


I combined some toffee bits and nuts in a bowl and then filled up the cored apples. I spooned a dollop of butter on top of each and put in the oven for 35 minutes at 350 degrees. I bought vanilla ice cream (so that means we have four types of ice cream in our freezer...blame it on my pregnancy) which was delicious on top.


Hope you enjoy!


Whatever Goes Wednesday, Blue Cricket Design, What's Cooking Wednesday, Somewhat Simple, Rock Your Recipes, Tatertots & Jello